Squid Cache(简称为Squid)是HTTP代理服务器软件。Squid用途广泛,可以作为缓存服务器,可以过滤流量帮助网络安全,也可以作为代理服务器链中的一环,向上级代理转发数据或直接连接互联网。Squid程序在Unix一类系统运行。由于它是开源软件,有网站修改Squid的源代码,编译为原生Windows版[2];用户也可在Windows里安装Cygwin,然后在Cygwin里编译Squid。
Squid历史悠久,功能完善。除了HTTP外,对FTP与HTTPS的支持也相当好,在3.0测试版中也支持了IPv6。但是Squid的上级代理不能使用SOCKS协议。
环境
这里使用的是CentOS 6.7来搭建代理服务器。
[root@Q1nghuan ~]# uname -a
Linux Q1nghuan 3.10.0-1160.45.1.el7.x86_64 #1 SMP Wed Oct 13 17:20:51 UTC 2021 x86_64 x86_64 x86_64 GNU/Linux
[root@Q1nghuan ~]# cat /etc/redhat-release
CentOS Linux release 7.9.2009 (Core)
安装Squid
使用yum命令安装Squid
yum install squid -y
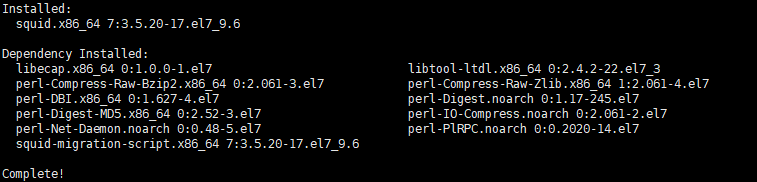
确定安装版本
rpm -qa |grep squid
配置Squid
首先要开启服务器网卡的数据转发功能,0为关闭,1为开启。
[root@Q1nghuan ~]# sysctl -a |grep -w ip_forward
net.ipv4.ip_forward = 0
临时生效: sysctl -w net.ipv4.ip_forward=1
修改/etc/sysctl.conf配置文件中的net.ipv4.ip_forward
[root@Q1nghuan ~]# vim /etc/sysctl.conf
刷新配置文件使之生效
[root@Q1nghuan ~]# sysctl -p
[root@Q1nghuan ~]# sysctl -a |grep -w ip_forward
net.ipv4.ip_forward = 1
Squid安装后默认设置为了拒绝所有服务器连接,只需要修改成所有服务器连接即可。
# vim /etc/squid/squid.conf
http_access allow all
启动Squid
systemctl start squid.service
# systemctl enable squid.service 设置成开机启动
systemctl status squid
[root@Q1nghuan ~]# systemctl status squid
● squid.service - Squid caching proxy
Loaded: loaded (/usr/lib/systemd/system/squid.service; enabled; vendor preset: disabled)
Active: active (running) since Thu 2021-12-02 19:00:34 CST; 40s ago
Main PID: 29411 (squid)
CGroup: /system.slice/squid.service
├─29411 /usr/sbin/squid -f /etc/squid/squid.conf
├─29413 (squid-1) -f /etc/squid/squid.conf
└─29414 (logfile-daemon) /var/log/squid/access.log
Dec 02 19:00:34 Q1nghuan systemd[1]: Starting Squid caching proxy...
Dec 02 19:00:34 Q1nghuan squid[29411]: Squid Parent: will start 1 kids
Dec 02 19:00:34 Q1nghuan squid[29411]: Squid Parent: (squid-1) process 29413 started
Dec 02 19:00:34 Q1nghuan systemd[1]: Started Squid caching proxy.此时已经是处于可用的状态了。
如果是云服务器可能存在策略限制,需要放行默认的3128端口。
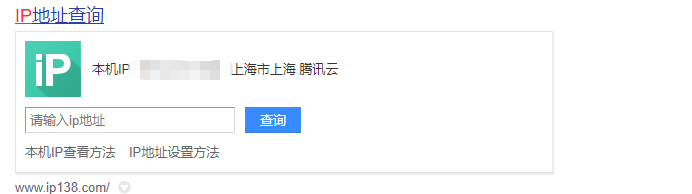
测试连通性
Windows下测试:
使用SwitchyOmega工具,配置一条HTTP代理,默认端口是3128。

切换到新建的策略,代理成功

Linux下测试:
wget -e "http_proxy=http://***.**.**.***" https://www.baidu.com[root@Ubuntu ~]# wget -e "http_proxy=http://***.**.**.***" https://www.baidu.com --2021-12-02 19:26:05-- https://www.baidu.com/ 正在解析主机 www.baidu.com (www.baidu.com)... 180.101.49.12, 180.101.49.11 正在连接 www.baidu.com (www.baidu.com)|180.101.49.12|:443... 已连接。 已发出 HTTP 请求,正在等待回应... 200 OK 长度: 2443 (2.4K) [text/html] 正在保存至: “index.html” index.html 100%[==================================================================>] 2.39K --.-KB/s 用时 0s 2021-12-02 19:26:05 (112 MB/s) - 已保存 “index.html” [2443/2443])全局代理配置
vim /etc/profile#在最后加入(有认证的情况)
export http_proxy=”http://squid:[email protected]:3128"

export https_proxy=”http://squid:[email protected]:3128"
如果没有开启认证
http_proxy=http://192.168.0.200:3128

https_proxy=http://192.168.0.200:3128

source /etc/profile
增加安全验证
直接裸奔不太安全,首先把默认的端口改了,改成一个自己喜欢的端口(记得同步放行策略)。
# vim /etc/squid/squid.conf
http_port 3129然后可以使用httpd-tools工具添加密码验证
# 没有就先安装yum install httpd-tools -y
# 生成密码文件,指定文件路径,其中squid是用户名,密码不能超过8个字符
htpasswd -cd /etc/squid3/passwords squid
测试生成的密码文件
# /usr/lib64/squid/basic_ncsa_auth /etc/squid3/passwords
squid 123456
ok
# 测试完成,crtl + c 打断
配置Squid文件
# vim /etc/squid/squid.conf
# And finally deny all other access to this proxy
auth_param basic program /usr/lib64/squid/basic_ncsa_auth /etc/squid3/passwords #账户密码文件
auth_param basic realm proxy
auth_param basic children 50 #最多 50 个账户同时运行
auth_param basic realm CoolTube Proxy Server #密码框描述
auth_param basic credentialsttl 2 hours #认证持续时间
acl authenticated proxy_auth REQUIRED #对 authenticated 进行外部认证
http_access allow authenticated #允许 authenticated 中的成员访问
http_access deny all #拒绝所有其他访问
visible_hostname squid.CoolTube #代理机名字
重启服务
[root@Q1nghuan ~]# squid -z
2021/12/02 21:05:35| Squid is already running! Process ID 29413
[root@Q1nghuan ~]# systemctl restart squid.service
[root@Q1nghuan ~]# systemctl status squid
● squid.service - Squid caching proxy
Loaded: loaded (/usr/lib/systemd/system/squid.service; enabled; vendor preset: disabled)
Active: active (running) since Thu 2021-12-02 21:05:46 CST; 22s ago
Process: 26752 ExecStop=/usr/sbin/squid -k shutdown -f $SQUID_CONF (code=exited, status=0/SUCCESS)
Process: 26761 ExecStart=/usr/sbin/squid $SQUID_OPTS -f $SQUID_CONF (code=exited, status=0/SUCCESS)
Process: 26754 ExecStartPre=/usr/libexec/squid/cache_swap.sh (code=exited, status=0/SUCCESS)
Main PID: 26763 (squid)
CGroup: /system.slice/squid.service
├─26763 /usr/sbin/squid -f /etc/squid/squid.conf
├─26765 (squid-1) -f /etc/squid/squid.conf
└─26766 (logfile-daemon) /var/log/squid/access.log

Dec 02 21:05:46 Q1nghuan systemd[1]: Starting Squid caching proxy...
Dec 02 21:05:46 Q1nghuan squid[26763]: Squid Parent: will start 1 kids
Dec 02 21:05:46 Q1nghuan squid[26763]: Squid Parent: (squid-1) process 26765 started
Dec 02 21:05:46 Q1nghuan systemd[1]: Started Squid caching proxy.
连接测试,弹出需要账号密码

在SwitchyOmega中配置账号密码

连接成功
查看日志
查看运行日志
# tail -f /var/log/squid/cache.logtail默认显示最后10行。-f参数代表实时更新
查看连接日志
# tail -f /var/log/squid/access.log增强流量匿名性
普通的代理会把原来的client信息放在X-Forwarded-For:这个header当中,这样子,我们请求的服务器就会知道我们的请求是从哪里来的了,这样子,我们显然没有做到匿名。所以我们通过forwarded_for off把这个信息去掉达到匿名的效果。
# ANONYMOUS PROXY
forwarded_for off
request_header_access Allow allow all
request_header_access Authorization allow all
request_header_access WWW-Authenticate allow all
request_header_access Proxy-Authorization allow all
request_header_access Proxy-Authenticate allow all
request_header_access Cache-Control allow all
request_header_access Content-Encoding allow all
request_header_access Content-Length allow all
request_header_access Content-Type allow all
request_header_access Date allow all
request_header_access Expires allow all
request_header_access Host allow all
request_header_access If-Modified-Since allow all
request_header_access Last-Modified allow all
request_header_access Location allow all
request_header_access Pragma allow all
request_header_access Accept allow all
request_header_access Accept-Charset allow all
request_header_access Accept-Encoding allow all
request_header_access Accept-Language allow all
request_header_access Content-Language allow all
request_header_access Mime-Version allow all
request_header_access Retry-After allow all
request_header_access Title allow all
request_header_access Connection allow all
request_header_access Proxy-Connection allow all
request_header_access User-Agent allow all
request_header_access Cookie allow all
request_header_access All deny all

request_header_access Via deny all
request_header_access Forwarded-For deny all
request_header_access X-Forwarded-For deny allrequest_header_access中的allow all是指squid保留我们client请求的header信息,如果使用deny则squid会把我们对应的header也一起隐藏掉。我们最好是保留header,因为我们用到了不同的useragent。
重启服务
[root@Q1nghuan ~]# squid -z
[root@Q1nghuan ~]# systemctl restart squid.service
[root@Q1nghuan ~]# systemctl status squid
也可以在配置中增加一条关闭缓存服务
#vim /etc/squid/squid.conf
cache deny all